Saturday, 28 February 2015
**** New CT Tutorial for Amy Marie - Sweetheart ****

Now for the Tutorial
This tutorial is written with the assumption that you have working knowledge of PSP.
It was written by Dance In The Rain on 28th February 2015 & is intended for educational purposes only.
Supplies:
Scrap Kit: Sweet Heart by Amy Marie's Kits found HERE
Tube: Jenny by Souldesigner found HERE
Font of Choice - I used Academic M54
Mask: No Mask was used for this Tag.
♥ Lets get started ♥
For the Drop Shadow on everything except the tube I am using the following settings:
Vertical: 1
Horizontal: 2
Opacity: 100
Blur: 3.00
Color: Black (You can use any color you wish)
Remember to save everything as you go along in order not to lose it in case of a crash.
DNR means Do Not Resize.
C&P means Copy & Paste.
DS means Drop Shadow.
I am using the following elements frames & Papers:
* Paper 13 - DNR
* Element 38 - Resized to 115%
You can look back at my image for placement of elements.
Open Paper 13 (DNR)
C&P Element 38 on to your mask layer.
Resize to 115%. Apply Drop Shadow & Position.
C&P your Tube on to your image.
DNR. Position & Apply Drop Shadow.
Make sure the Tube is place OVER the Paper by UNDER Element 38.
Go to photo effects - Black & White Film & Apply the following Settings

Reduce Opacity of the Tube to 60%
For the Boarder I have done the Following:
* Layers - Merge Visible
* Selections - Select All - Modify - Contract - Number of Pixels is 4
* Selections - Invert - Paste Paper 13 on to image
* Select Merged Image
* Selections - Invert
* Select Paper Layer - Hit Delete.
* Selections - Select None.
* Adjust - Add/Remove Noise - 100% Noise - Random - Monochrome box ticked.
Use the following Drop Shadow Settings for the tube & name:
Vertical: 2
Horizontal: 2
Opacity: 100
Blur: 3.00
Color: Black (You can use any color you wish)
We are almost done now.
Add your name. I used font size 30 and color White with an outline color Green.
I have also applied a Drop Shadow using the TUBE settings.
Add your copyright info, License number & Merge Visible.
Save & you're done. Simply & Easy.
I would love to see what you make using my tutorial.
Thank you for following my Tutorial & I hope you enjoyed it.
If you have any questions please feel free to email me at danceintherain1990@gmail.com
Monday, 23 February 2015
**** Tag Show Off for Scraps Dimensions Kit, Lucky Me ****
I have also made a couple of Snags.
Snags MUST be left as they are. DO NOT add ANYTHING to them.
This awesome Kit contains 80 Gorgeous Elements & 10 really Pretty Papers.
It is currently on Sale for just 80cents HERE.

Tag for the Kit Designer
Now the FTU Snags.


**** New Blog Freebie - CU OK Glitter Boarders ****
Please read the TOU in the download file - DO NOT SHARE!!
They are 800x800 & PNG Format.
You can download them HERE

Wednesday, 18 February 2015
**** New CT Tutorial for Inzpired Creationz Store using the Artwork of Kajenna, Puppy Tube & Kit by Rieneke Designs, For The Sweetest ****

Now for the Tutorial
This tutorial is written with the assumption that you have working knowledge of PSP.
It was written by Dance In The Rain on 18th February 2015 & is intended for educational purposes only.
Supplies:
Scrap Kit: For The Sweetest by Rieneke Designs found HERE
Tube: Puppy by Kajenna found HERE
Font of Choice - I used Love Heart.
Mask: Number 35 by Chrissy's Chaos found HERE
♥ Lets get started ♥
For the Drop Shadow on everything except the tube I am using the following settings:
Vertical: 1
Horizontal: 2
Opacity: 100
Blur: 3.00
Color: Black (You can use any color you wish)
Remember to save everything as you go along in order not to lose it in case of a crash.
DNR means Do Not Resize.
C&P means Copy & Paste.
DS means Drop Shadow.
I am using the following elements frames & Papers:
* Paper 11 - DNR
* Element 99 - Resized to 125%
* Element 35 - Resized to 115%
* Element 50 - Resized to 120%
* Element 90 - DNR
* Element 121 - Resized to 115%
* Element 62 - Resized to 125%
* Element 108 - DNR
* Element 123 - DNR
* Element 26 - Resized to 65%
* Element 16 - DNR
* Element 7 - DNR
You can look back at my image for placement of elements.
Open Paper 11 (DNR)
Open Mask in a different window (DNR)
Click on Paper 11 window and go to Layers, New Layer Group, Click ok.
Click on Layers again & New Mask Layer, From Image.
In the source window click on the Mask Layer. Click ok.
C&P Element 99 on to your mask layer.
Resize to 125%. Apply Drop Shadow & Position.
C&P Element 35 on to your image.
Resized to 115%. Position. Apply Drop Shadow.
C&P Element 50 on to your image.
Resize to 120%. Position & apply Drop Shadow.
C&P Element 90 on to your image.
DNR. Position & apply Drop Shadow.
C&P Element 121 on to your image.
Resize to 115%. Position & apply Drop Shadow.
C&P Element 62 on to your image.
Resize to 125%. Position & NO Drop Shadow.
C&P Element 108 on to your image.
DNR. Position & NO Drop Shadow.
C&P Element 123 on to your image.
DNR. Position & apply Drop Shadow.
C&P Element 26 on to your image.
Resize to 65%. Position & apply Drop Shadow.
C&P Element 16 on to your image.
DNR. Position & apply Drop Shadow.
C&P Element 7 on to your image.
DNR. Position & apply Drop Shadow.
C&P your Tube on to your image.
Resize to 45%. Position & Apply Drop Shadow.
Use the following Drop Shadow Settings for the tube & name:
Vertical: 3
Horizontal: 3
Opacity: 100
Blur: 3.00
Color: Black (You can use any color you wish)
We are almost done now.
Add your name. I used font size 22 and color White with an outline color Pink.
I have also applied a Drop Shadow using the TUBE settings.
Add your copyright info, License number & Merge Visible.
Save & you're done. Simply & Easy.
I would love to see what you make using my tutorial.
Thank you for following my Tutorial & I hope you enjoyed it.
If you have any questions please feel free to email me at danceintherain1990@gmail.com

Sunday, 15 February 2015
**** New Combined CT Tutorial for Amy Marie's Kit Sweetness & Stan Dudin's Tube, Cute Helen ****

Now for the Tutorial
This tutorial is written with the assumption that you have working knowledge of PSP.
It was written by Dance In The Rain on 15th February 2015 & is intended for educational purposes only.
Supplies:
Scrap Kit: Sweetness by Amy Marie's Kits found HERE
Tube: Cute Helen by Stan Dudin found HERE
Font of Choice - I used Oleo Script
Mask: Number 6 By Chrissy's Chaos found HERE
♥ Lets get started ♥
For the Drop Shadow on everything except the tube I am using the following settings:
Vertical: 1
Horizontal: 2
Opacity: 100
Blur: 3.00
Color: Black (You can use any color you wish)
Remember to save everything as you go along in order not to lose it in case of a crash.
DNR means Do Not Resize.
C&P means Copy & Paste.
DS means Drop Shadow.
I am using the following elements frames & Papers:
* Paper 16 - DNR
* Element 21 - DNR
* Element 6 - DNR
* Element 25 - Resized to 115%
* Element 59 - Resized to 115%
* Element 56 - DNR
* Element 86 - DNR
* Element 24 - DNR
* Element 93 - DNR
* Element 110 - DNR
You can look back at my image for placement of elements.
Open Paper 16 (DNR)
Open Mask in a different window (DNR)
Click on Paper 16 window and go to Layers, New Layer Group, Click ok.
Click on Layers again & New Mask Layer, From Image.
In the source window click on the Mask Layer. Click ok.
C&P Element 21 on to your mask layer.
DNR. Apply Drop Shadow & Position.
C&P Element 6 on to your image.
DNR. Position. Apply Drop Shadow.
Duplicate Element 6 - Flip Horizontally - Position - No need to add extra Drop Shadow.
C&P Element 25 on to your image.
Resize to 115%. Position & apply Drop Shadow.
C&P Element 59 on to your image.
Resize to 115%. Position & apply Drop Shadow.
C&P Element 56 on to your image.
DNR. Position & apply Drop Shadow.
C&P Element 86 on to your image.
DNR. Position & apply Drop Shadow.
C&P Element 24 on to your image.
DNR. Position & apply Drop Shadow.
C&P Element 93 on to your image.
DNR. Position & apply Drop Shadow.
C&P Element 110on to your image.
DNR. Position & apply Drop Shadow.
C&P your Tube on to your image.
Resize to 55%. Position & Apply Drop Shadow.
Use the following Drop Shadow Settings for the tube & name:
Vertical: 2
Horizontal: 2
Opacity: 100
Blur: 3.00
Color: Black (You can use any color you wish)
We are almost done now.
Add your name. I used font size 14 and color White with an outline color Deep Pink.
I have also applied a Drop Shadow using the TUBE settings.
Add your copyright info, License number & Merge Visible.
Save & you're done. Simply & Easy.
I would love to see what you make using my tutorial.
Thank you for following my Tutorial & I hope you enjoyed it.
If you have any questions please feel free to email me at danceintherain1990@gmail.com

Thursday, 12 February 2015
**** CT Tutorial for Inzpired Creationz - Glitz ****

Now for the Tutorial
This tutorial is written with the assumption that you have working knowledge of PSP.
It was written by Dance In The Rain on 12th February 2015 & is intended for educational purposes only.
Supplies:
Scrap Kit: Glitz by Inzpired Creationz found HERE
Tube: Melody by Alexandra Vanhek found HERE
Font of Choice - I used Grandma's Garden.
Mask: I'm not sure who's Mask this it. If it is yours please let me know.
♥ Lets get started ♥
For the Drop Shadow on everything except the tube I am using the following settings:
Vertical: 1
Horizontal: 2
Opacity: 100
Blur: 3.00
Color: Black (You can use any color you wish)
Remember to save everything as you go along in order not to lose it in case of a crash.
DNR means Do Not Resize.
C&P means Copy & Paste.
DS means Drop Shadow.
I am using the following elements frames & Papers:
* Paper 7 - DNR
* Disco Ball - Resized to 135%
* Frame 2 - DNR
* Frame 3 - DNR
* Cityscape - Resized to 125%
* Gift 1 - Resized to 55%
* Money 1 - Resized to 50%
* Cards 1 - Resized to 65%
* Car 2 - Resized to 75%
* Dog 1 - Resized to 50%
* Glitter 1 - DNR
* Sparkles 2 - DNR
You can look back at my image for placement of elements.
Open Paper 7 (DNR)
Open Mask in a different window (DNR)
Click on Paper 7 window and go to Layers, New Layer Group, Click ok.
Click on Layers again & New Mask Layer, From Image.
In the source window click on the Mask Layer. Click ok.
C&P Disco Ball on to your mask layer.
Resize to 135%. Apply Drop Shadow & Position.
C&P Frame 2 on to your image.
DNR. Position. Apply Drop Shadow.
C&P Frame 3 on to your image.
DNR. Position & apply Drop Shadow.
C&P Cityscape on to your image.
Resize to 125%. Position & apply Drop Shadow.
C&P Gift 1 on to your image.
Resize to 55%. Position & apply Drop Shadow.
C&P Money 1 on to your image.
Resize to 50%. Position & apply Drop Shadow.
C&P Cards 1 on to your image.
Resize to 65%. Position & apply Drop Shadow.
C&P Car 2 on to your image.
Resize to 75%. Position & apply Drop Shadow.
C&P Dog 1 on to your image.
Resize to 50%. Position & apply Drop Shadow.
C&P Glitter 1 on to your image.
DNR. Position & apply Drop Shadow.
C&P Sparkles 2 on to your image.
DNR. Position & NO Drop Shadow.
C&P your Tube on to your image.
Resize to 45%. Position & Apply Drop Shadow.
Use the following Drop Shadow Settings for the tube & name:
Vertical: 3
Horizontal: 3
Opacity: 100
Blur: 3.00
Color: Black (You can use any color you wish)
We are almost done now.
Add your name. I used font size 26 and color White with an outline color Gold.
I have also applied a Drop Shadow using the TUBE settings.
Add your copyright info, License number & Merge Visible.
Save & you're done. Simply & Easy.
I would love to see what you make using my tutorial.
Thank you for following my Tutorial & I hope you enjoyed it.
If you have any questions please feel free to email me at danceintherain1990@gmail.com
**** New CT Tutorial for Chris Pastel - Marianne Tube ****

Now for the Tutorial
This tutorial is written with the assumption that you have working knowledge of PSP.
It was written by Dance In The Rain on 12th February 2015 & is intended for educational purposes only.
Supplies:
Scrap Kit: Steampunk Beauty by Dance In The Rain found HERE
Tube: Marianne by Chris Pastel found HERE
Font of Choice - I used Script MT Bold.
Mask: I'm not sure who's Mask this is. If it is yours, Let me know.
♥ Lets get started ♥
For the Drop Shadow on everything except the tube I am using the following settings:
Vertical: 1
Horizontal: 2
Opacity: 100
Blur: 3.00
Color: Black (You can use any color you wish)
Remember to save everything as you go along in order not to lose it in case of a crash.
DNR means Do Not Resize.
C&P means Copy & Paste.
DS means Drop Shadow.
I am using the following elements frames & Papers:
* Paper 15 - DNR
* Element 9 - DNR
* Element 12 - DNR
* Element 71 - Resized to 115%
* Element 149 - DNR
* Element 102 - Resized to 65%
* Element 21 - Resized to 65%
You can look back at my image for placement of elements.
Open Paper 15 (DNR)
Open Mask in a different window (DNR)
Click on Paper 15 window and go to Layers, New Layer Group, Click ok.
Click on Layers again & New Mask Layer, From Image.
In the source window click on the Mask Layer. Click ok.
C&P Element 9 on to your mask layer.
DNR. Apply Drop Shadow & Position.
C&P Element 12 on to your image.
DNR. Position. Apply Drop Shadow.
C&P Element 71 on to your image.
Resize to 115%. Position & apply Drop Shadow.
C&P Element 149 on to your image.
DNR and position. Apply Drop Shadow.
C&P Element 102 on to your image.
Resize to 65%. Position & apply Drop Shadow.
C&P Element 21 on to your image.
Resize to 65%. Position & apply Drop Shadow.
C&P your Tube on to your image.
Resize to 65%. Position & Apply Drop Shadow.
Use the following Drop Shadow Settings for the tube & name:
Vertical: 2
Horizontal: 2
Opacity: 100
Blur: 3.00
Color: Black (You can use any color you wish)
We are almost done now.
Add your name. I used font size 24 and color White with an outline color Brown.
I have also applied a Drop Shadow using the TUBE settings.
Add your copyright info, License number & Merge Visible.
Save & you're done. Simply & Easy.
I would love to see what you make using my tutorial.
Thank you for following my Tutorial & I hope you enjoyed it.
If you have any questions please feel free to email me at danceintherain1990@gmail.com
**** New CT Tutorial for Inzpired Creaitonz Store - Winters Kiss Kit by Kizzed By Kelz & Carla Tube by Chris Pastel ****

Now for the Tutorial
This tutorial is written with the assumption that you have working knowledge of PSP.
It was written by Dance In The Rain on 12th February 2015 & is intended for educational purposes only.
Supplies:
Scrap Kit: Winters Kiss by Kizzed By Kelz found HERE
Tube: Carla by Chris Pastel found HERE
Font of Choice - I used Carpenter Script.
Mask: Number 28 by Chrissy's Chaos found HERE
♥ Lets get started ♥
For the Drop Shadow on everything except the tube I am using the following settings:
Vertical: 1
Horizontal: 2
Opacity: 50
Blur: 3.00
Color: Black (You can use any color you wish)
Remember to save everything as you go along in order not to lose it in case of a crash.
DNR means Do Not Resize.
C&P means Copy & Paste.
DS means Drop Shadow.
I am using the following elements frames & Papers:
* Paper 7 - DNR
* Element 7 - Resized to 125%
* Element 1 - DNR
* Element 2 - Resized to 115%
* Element 23 - Resized to 125%
* Element 26 - DNR
* Element 53 - DNR
* Element 108 - DNR
* Element 115 - Resized to 65%
* Element 88 - DNR
* Element 132 - Resized to 85%
You can look back at my image for placement of elements.
Open Paper 7 (DNR)
Open Mask in a different window (DNR)
Click on Paper 7 window and go to Layers, New Layer Group, Click ok.
Click on Layers again & New Mask Layer, From Image.
In the source window click on the Mask Layer. Click ok.
C&P Element 7 on to your mask layer.
Resize to 125%. Apply Drop Shadow & Position.
C&P Element 1 on to your mask layer.
DNR. Apply Drop Shadow & Position.
C&P Element 2 on to your mask layer.
Resize to 115%. Apply Drop Shadow & Position.
C&P Element 23 on to your mask layer.
Resize to 125%. NO Drop Shadow & Position.
C&P Element 26 on to your mask layer.
DNR. NO Drop Shadow & Position.
C&P Element 53 on to your mask layer.
DNR. Apply Drop Shadow & Position.
C&P Element 108 on to your mask layer.
DNR. Apply Drop Shadow & Position.
C&P Element 115 on to your mask layer.
Resize to 65%. Apply Drop Shadow & Position.
C&P Element 88 on to your mask layer.
DNR. Apply Drop Shadow & Position.
C&P Element 132 on to your mask layer.
Resize to 85%. Apply Drop Shadow & Position.
C&P your Tube on to your image.
Resize to 45%. Position & Apply Drop Shadow.
Use the following Drop Shadow Settings for the tube & name:
Vertical: 3
Horizontal: 3
Opacity: 50
Blur: 3.00
Color: Black (You can use any color you wish)
We are almost done now.
Add your name. I used font size 22 and color Pink.
I have also applied a Drop Shadow using the TUBE settings.
Add your copyright info, License number & Merge Visible.
Save & you're done. Simply & Easy.
I would love to see what you make using my tutorial.
Thank you for following my Tutorial & I hope you enjoyed it.
If you have any questions please feel free to email me at danceintherain1990@gmail.com
Monday, 9 February 2015
**** New CT Tutorial for Amy Marie - Quinn - Matching Tube by Designs By Norella ****

Now for the Tutorial
This tutorial is written with the assumption that you have working knowledge of PSP.
It was written by Dance In The Rain on 9th February 2015 & is intended for educational purposes only.
Supplies:
Scrap Kit: Quinn by Amy Marie's Kits found HERE
Tube: Quinn by Designs By Norella found HERE
Font of Choice - I used Lobster Two
Mask: Number 111 by Millie's PSP Madness found HERE
♥ Lets get started ♥
For the Drop Shadow on everything except the tube I am using the following settings:
Vertical: 1
Horizontal: 2
Opacity: 100
Blur: 3.00
Color: Black (You can use any color you wish)
Remember to save everything as you go along in order not to lose it in case of a crash.
DNR means Do Not Resize.
C&P means Copy & Paste.
DS means Drop Shadow.
I am using the following elements frames & Papers:
* Paper 17 - DNR
* Element 16 - DNR
* Element 35 - DNR
* Element 8 - DNR
* Element 4 - Resized to 75%
* Element 1 - Resized to 65%
* Element 100 - DNR
* Element 46 - Resized to 65%
* Element 19 - DNR
* Element 37 - Resized to 75%
* Element 48 - Resized to 65%
* Element 43 - DNR
* Element 54 - DNR
* Element 94 - Resized to 75%
* Element 70 - DNR
* Element 77 - DNR
* Element 39 - DNR
* Element 73 - DNR
You can look back at my image for placement of elements.
Open Paper 17 (DNR)
Open Mask in a different window (DNR)
Click on Paper 17 window and go to Layers, New Layer Group, Click ok.
Click on Layers again & New Mask Layer, From Image.
In the source window click on the Mask Layer. Click ok.
C&P Element 16 on to your mask layer.
DNR. Apply Drop Shadow & Position.
C&P Element 35 on to your image.
DNR. Position. Apply Drop Shadow.
C&P Element 8 on to your image.
DNR. Position & apply Drop Shadow.
C&P Element 4 on to your image.
Resize to 75%. Position & apply Drop Shadow.
C&P Element 1 on to your image.
Resize to 65%. Position & apply Drop Shadow.
C&P Element 100 on to your image.
DNR. Position & apply Drop Shadow.
C&P Element 46 on to your image.
Resize to 65%. Position & apply Drop Shadow.
C&P Element 19 on to your image.
DNR. Position & apply Drop Shadow.
C&P Element 37 on to your image.
Resize to 75%. Position & apply Drop Shadow.
C&P Element 48 on to your image.
Resize to 65%. Position & apply Drop Shadow.
C&P Element 43 on to your image.
DNR. Position & apply Drop Shadow.
C&P Element 54 on to your image.
DNR. Position & apply Drop Shadow.
C&P Element 94 on to your image.
Resize to 75%. Position & apply Drop Shadow.
C&P Element 70 on to your image.
DNR. Position & apply Drop Shadow.
C&P Element 77 on to your image.
DNR. Position & apply Drop Shadow.
C&P Element 39 on to your image.
DNR. Position & apply Drop Shadow.
C&P Element 73 on to your image.
Resize to 65%. Position & NO Drop Shadow.
C&P your Tube on to your image.
Resize to 75%. Position & Apply Drop Shadow.
C&P your Tube on to your image again.
Resize to 25%. Position & Apply Drop Shadow.
Use the following Drop Shadow Settings for the tube & name:
Vertical: 2
Horizontal: 2
Opacity: 100
Blur: 3.00
Color: Black (You can use any color you wish)
We are almost done now.
Add your name. I used font size 18 and color Purple with an outline color Green.
I have also applied a Drop Shadow using the TUBE settings.
Add your copyright info, License number & Merge Visible.
Save & you're done. Simply & Easy.
I would love to see what you make using my tutorial.
Thank you for following my Tutorial & I hope you enjoyed it.
If you have any questions please feel free to email me at danceintherain1990@gmail.com
Sunday, 8 February 2015
**** CT Timeline Set for Drea's Creations Kit, Sweet On You ****
I made this Timeline Set using a Kit from Drea's Creations called Sweet On You.
This Kit has 147 gorgeous Elements & 29 Stunning Papers.
You can purchase the Kit HERE for just $1. What a bargain.
Please do NOT save this set. It was made for the Kit Designer Only.


**** CT Tutorial for Amy Marie - Polar Love ****

Now for the Tutorial
This tutorial is written with the assumption that you have working knowledge of PSP.
It was written by Dance In The Rain on 8th February 2015 & is intended for educational purposes only.
Supplies:
Scrap Kit: Polar Love by Amy Marie's Kits found HERE
No Tube was used on this Tut. It is a scraps only Tut.
Font of Choice - I used Grand Hotel.
Mask: 6 by Millie's PSP Madness found HERE.
♥ Lets get started ♥
For the Drop Shadow on everything except the tube I am using the following settings:
Vertical: 1
Horizontal: 2
Opacity: 100
Blur: 3.00
Color: Black (You can use any color you wish)
Remember to save everything as you go along in order not to lose it in case of a crash.
DNR means Do Not Resize.
C&P means Copy & Paste.
DS means Drop Shadow.
I am using the following elements frames & Papers:
* Paper 12 - DNR
* Element 49 - Resized to 150%
* Element 48 - DNR
* Element 76 - DNR
* Element 51 - DNR
* Element 52 - DNR
* Element 66 - DNR
* Element 33 - DNR
* Element 1 - DNR
* Element 3 - DNR
* Element 64 - DNR
You can look back at my image for placement of elements.
Open Paper 12 (DNR)
Open Mask in a different window (DNR)
Click on Paper 12 window and go to Layers, New Layer Group, Click ok.
Click on Layers again & New Mask Layer, From Image.
In the source window click on the Mask Layer. Click ok.
C&P Element 49 on to your mask layer.
Resize to 150%. Apply Drop Shadow & Position.
C&P Element 48 on to your image.
DNR. Position & apply Drop Shadow.
Duplicate Element 48 - Flip Horizontally - Position - No need to add extra Drop Shadow.
C&P Element 76 on to your image.
DNR and position. Apply Drop Shadow.
Duplicate Element 76 - Flip Horizontally - Position - No need to add extra Drop Shadow.
C&P Element 51 on to your image.
DNR. Apply Drop Shadow & Position.
C&P Element 52 on to your image.
DNR. Apply Drop Shadow & Position.
C&P Element 66 on to your image.
DNR. Apply Drop Shadow & Position.
C&P Element 33 on to your image.
DNR. Apply Drop Shadow & Position.
C&P Element 1 on to your image.
DNR. Apply Drop Shadow & Position.
C&P Element 3 on to your image.
DNR. Apply Drop Shadow & Position.
C&P Element 64 on to your image.
DNR. Apply Drop Shadow & Position.
Use the following Drop Shadow Settings for the name:
Vertical: 3
Horizontal: 3
Opacity: 100
Blur: 3.00
Color: Black (You can use any color you wish)
We are almost done now.
Add your name. I used font size 20 and color Blue with an outline color Grey.
Apply Drop Shadow.
Add your copyright info, License number & Merge Visible.
Save & you're done. Simply & Easy.
I would love to see what you make using my tutorial.
Thank you for following my Tutorial & I hope you enjoyed it.
If you have any questions please feel free to email me at danceintherain1990@gmail.com
**** New CT Tutorial for Amy Marie - Sexy Amelia ****

Now for the Tutorial
This tutorial is written with the assumption that you have working knowledge of PSP.
It was written by Dance In The Rain on 8th February 2015 & is intended for educational purposes only.
Supplies:
Scrap Kit: Sexy Amelia by Amy Marie's Kits found HERE
Tube: Sabrina by VeryMany Tubes found HERE
Font of Choice - I used Glass Antiqua
Mask: Number 8 by Chrissy's Chaos found HERE
♥ Lets get started ♥
For the Drop Shadow on everything except the tube I am using the following settings:
Vertical: 1
Horizontal: 2
Opacity: 100
Blur: 3.00
Color: Black (You can use any color you wish)
Remember to save everything as you go along in order not to lose it in case of a crash.
DNR means Do Not Resize.
C&P means Copy & Paste.
DS means Drop Shadow.
I am using the following elements frames & Papers:
* Paper 17 - DNR
* Element 33 - Resized to 150%
* Element 51 - Resized to 125%
* Element 40 - DNR
* Element 48 - DNR
* Element 19 - Resized to 125%
* Element 72 - DNR
* Element 112 - Resized to 65%
* Element 104 - Resized to 75%
* Element 27 - DNR
* Element 114 - DNR
* Element 59 - Resized to 50%
You can look back at my image for placement of elements.
Open Paper 17 (DNR)
Open Mask in a different window (DNR)
Click on Paper 17 window and go to Layers, New Layer Group, Click ok.
Click on Layers again & New Mask Layer, From Image.
In the source window click on the Mask Layer. Click ok.
C&P Element 33 on to your mask layer.
Resize to 150%. Apply Drop Shadow & Position.
Duplicate Element 33 - Flip Horizontally & Position. No need to add extra Drop Shadow.
C&P Element 51 on to your image.
Resize to 125%. Position. Apply Drop Shadow.
C&P Element 40 on to your image.
DNR. Position & apply Drop Shadow.
C&P Element 48 on to your image.
DNR. Position & apply Drop Shadow.
C&P Element 19 on to your image.
Resize to 125%. Position & apply Drop Shadow.
C&P Element 72 on to your image.
DNR. Position & apply Drop Shadow.
C&P Element 112 on to your image.
Resize to 65%. Position & apply Drop Shadow.
C&P Element 104 on to your image.
Resize to 75%. Position & apply Drop Shadow.
C&P Element 27 on to your image.
DNR. Position & apply Drop Shadow.
C&P Element 114 on to your image.
DNR. Position & apply Drop Shadow.
C&P Element 59 on to your image.
Resize to 50%. Position & apply Drop Shadow.
C&P your Tube on to your image.
Resize to 60%. Position & Apply Drop Shadow.
Use the following Drop Shadow Settings for the tube & name:
Vertical: 3
Horizontal: 3
Opacity: 100
Blur: 3.00
Color: Black (You can use any color you wish)
We are almost done now.
Add your name. I used font size 18 and color White with an outline color Pink.
I have also applied a Drop Shadow using the TUBE settings.
Add your copyright info, License number & Merge Visible.
Save & you're done. Simply & Easy.
I would love to see what you make using my tutorial.
Thank you for following my Tutorial & I hope you enjoyed it.
If you have any questions please feel free to email me at danceintherain1990@gmail.com
**** New CT Tutorial for Inzpired Creationz Store. Melissa Tube by Alexandra Vanhek & Forever Love Kit by Inzpired Creationz ****

Now for the Tutorial
This tutorial is written with the assumption that you have working knowledge of PSP.
It was written by Dance In The Rain on 8th February 2015 & is intended for educational purposes only.
Supplies:
Scrap Kit: Forever Love by Inzpired Creationz found HERE
Tube: Melissa by Alexandra Vanhek found HERE
Font of Choice - I used Romance Fatal.
Mask: Number 112 by Millie's PSP Madness found HERE
♥ Lets get started ♥
For the Drop Shadow on everything except the tube I am using the following settings:
Vertical: 1
Horizontal: 2
Opacity: 100
Blur: 3.00
Color: Black (You can use any color you wish)
Remember to save everything as you go along in order not to lose it in case of a crash.
DNR means Do Not Resize.
C&P means Copy & Paste.
DS means Drop Shadow.
I am using the following elements frames & Papers:
* Paper 11 - DNR
* Wordart 3 - Resized to 165%
* Circle Frames - Resized to 85%
* Frame 1 - DNR
* Frame 3 - DNR
* Flowers 1 - DNR
* Roses 1 - Resized to 75%
You can look back at my image for placement of elements.
Open Paper 11 (DNR)
Open Mask in a different window (DNR)
Click on Paper 11 window and go to Layers, New Layer Group, Click ok.
Click on Layers again & New Mask Layer, From Image.
In the source window click on the Mask Layer. Click ok.
C&P Wordart 3 on to your mask layer.
Resize to 165%. NO Drop Shadow & Position.
C&P Circle Frames on to your image.
Resized to 85%. Position. Apply Drop Shadow.
C&P Frame 1 on to your image.
DNR. Position & apply Drop Shadow.
C&P Frame 3 on to your image.
DNR. Position & apply Drop Shadow.
C&P Flowers 1 on to your image.
DNR. Position & apply Drop Shadow.
C&P Roses 1 on to your image.
Resize to 75%. Position & apply Drop Shadow.
C&P your Tube on to your image.
Resize to 45%. Position & Apply Drop Shadow.
C&P your Tube on to your image again.
Resize to 75%. Position & Apply Drop Shadow.
Use the following Drop Shadow Settings for the tube & name:
Vertical: 3
Horizontal: 3
Opacity: 100
Blur: 3.00
Color: Black (You can use any color you wish)
We are almost done now.
Add your name. I used font size 72 and color White with an outline color Red.
I have also applied a Drop Shadow using the TUBE settings.
Add your copyright info, License number & Merge Visible.
Save & you're done. Simply & Easy.
I would love to see what you make using my tutorial.
Thank you for following my Tutorial & I hope you enjoyed it.
If you have any questions please feel free to email me at danceintherain1990@gmail.com
Friday, 6 February 2015
**** New CT Tutorial for KIT - Roman Zaric - Final Game ****

Now for the Tutorial
This tutorial is written with the assumption that you have working knowledge of PSP.
It was written by Dance In The Rain on 6th February 2015 & is intended for educational purposes only.
Supplies:
Scrap Kit: Goodnight by Dance In The Rain.
Tube: Final Game by Roman Zaric which can be found HERE.
(You must have a license to use this tube)
Font of Choice - I used A Little Sunshine
Mask: 8 by Chrissy's Chaos found HERE
♥ Lets get started ♥
For the Drop Shadow on everything except the tube I am using the following settings:
Vertical: 1
Horizontal: 2
Opacity: 100
Blur: 3.00
Color: Black (You can use any color you wish)
Tube Drop Shadow Settings:
Vertical: 3
Horizontal: 3
Opacity: 100
Blur: 3.00
Color: Black
Remember to save everything as you go along in order not to lose it in case of a crash.
DNR means Do Not Resize.
C&P means Copy & Paste.
DS means Drop Shadow.
I am using the following elements frames & Papers:
* Paper 7 - DNR
* Element 31 - Resized to 150%
* Element 17 - Resized to 150%
* Element 16 - DNR
* Element 13 - DNR
* Element 14 - DNR
* Element 18 - DNR
* Element 7 - Resized to 40%
* Element 26 - Resized to 40%
You can look back at my image for placement of elements.
Open Paper 7 (DNR)
Open Mask in a different window (DNR)
Click on Paper 7 window and go to Layers, New Layer Group, Click ok.
Click on Layers again & New Mask Layer, From Image.
In the source window click on the Mask Layer. Click ok.
C&P Element 31 on to your mask layer.
Resize to 150% Apply Drop Shadow & Position.
C&P Element 17 on to your image.
Resize to 150%. Position & apply Drop Shadow.
C&P Element 16 on to your image.
DNR. Position & apply Drop Shadow.
C&P Element 13 on to your image.
DNR. Position. Apply Drop Shadow.
C&P Element 14 on to your image.
DNR. Position. Apply Drop Shadow.
C&P Element 18 on to your image.
DNR. Position. Apply Drop Shadow.
C&P Element 7 on to your image.
Resize to 40%. Position & apply Drop Shadow.
C&P Element 26 on to your image.
Resize to 40%. Position & apply Drop Shadow.
C&P Your tube on to your image.
Resize to 30%. Position and Apply TUBE settings Drop Shadow.
We are almost done now.
Add your name. I used font size 48 and color Black with an outline color Purple.
I have also applied a Drop Shadow using the TUBE settings
Add your copyright info, License number & Merge Visible.
Save & you're done. Simply & Easy.
I would love to see what you make using my tutorial.
Thank you for following my Tutorial & I hope you enjoyed it.
If you have any questions please feel free to email me at danceintherain1990@gmail.com
**** New CT Tutorial for Amy Marie - Andrea ****

Now for the Tutorial
This tutorial is written with the assumption that you have working knowledge of PSP.
It was written by Dance In The Rain on 6th February 2015 & is intended for educational purposes only.
Supplies:
Scrap Kit: Andrea by Amy Marie's Kits found HERE
Tube: Andra by Very Many found HERE (It is an Exclusive Tube)
Font of Choice - I used Biloxi Script
Mask: Number 30 By Chrissy's Chaos found HERE
♥ Lets get started ♥
For the Drop Shadow on everything except the tube I am using the following settings:
Vertical: 1
Horizontal: 2
Opacity: 100
Blur: 3.00
Color: Black (You can use any color you wish)
Remember to save everything as you go along in order not to lose it in case of a crash.
DNR means Do Not Resize.
C&P means Copy & Paste.
DS means Drop Shadow.
I am using the following elements frames & Papers:
* Paper 1 - DNR
* Element 25 - Resized to 120%
* Element 23 - Resized to 125%
* Element 24 - DNR
* Element 5 - Resized to 75%
* Element 89 - Resized to 75%
* Element 82 - DNR
* Element 74 - DNR
* Element 73 - DNR
* Element 90 - Resized to 75%
* Element 13 - DNR
* Element 97 - DNR
* Element 88 - DNR
You can look back at my image for placement of elements.
Open Paper 1 (DNR)
Open Mask in a different window (DNR)
Click on Paper 1 window and go to Layers, New Layer Group, Click ok.
Click on Layers again & New Mask Layer, From Image.
In the source window click on the Mask Layer. Click ok.
C&P Element 25 on to your mask layer.
Resize to 120%. Apply Drop Shadow & Position.
C&P Element 23 on to your image.
Resized to 125%. Position. Apply Drop Shadow.
C&P Element 24 on to your image.
DNR. Position & apply Drop Shadow.
C&P Element 5 on to your image.
Resize to 75%. Position & apply Drop Shadow.
C&P Element 89 on to your image.
Resize to 75%. Position & apply Drop Shadow.
C&P Element 82 on to your image.
DNR. Position & apply Drop Shadow.
C&P Element 74 on to your image.
DNR. Position & apply Drop Shadow.
C&P Element 73 on to your image.
DNR. Position & apply Drop Shadow.
C&P Element 90 on to your image.
Resized to 75% Position & apply Drop Shadow.
C&P Element 13 on to your image.
DNR. Position & apply Drop Shadow.
C&P Element 97 on to your image.
DNR. Position & apply Drop Shadow.
C&P Element 88 on to your image.
DNR. Position & apply Drop Shadow.
C&P your Tube on to your image.
DNR. Position & Apply Drop Shadow.
C&p your Tube on to your image again.
Resize to 65%. Position & Apply Drop Shadow.
Use the following Drop Shadow Settings for the tube & name:
Vertical: 2
Horizontal: 2
Opacity: 100
Blur: 3.00
Color: Black (You can use any color you wish)
We are almost done now.
Add your name. I used font size 22 and color White with an outline color Purple.
I have also applied a Drop Shadow using the TUBE settings.
Add your copyright info, License number & Merge Visible.
Save & you're done. Simply & Easy.
I would love to see what you make using my tutorial.
Thank you for following my Tutorial & I hope you enjoyed it.
If you have any questions please feel free to email me at danceintherain1990@gmail.com
**** New CT Timeline Set - Clockwork Girl ****
For this Set I have used the Kit, Clockwork Girl by Michelle's Myths.
This Kit can be Purchased HERE.
Please do NOT save this set. It was made for the Kit Designer Only.


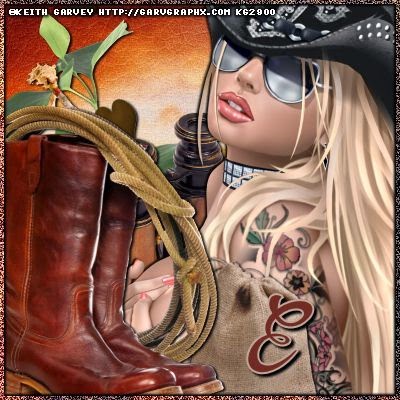
**** Timeline Set made with Michelle's Myths Just a Cowgirl Kit ****
This set is snaggable but is for PU ONLY. You must NOT add anything to this, that includes names.


Subscribe to:
Comments
(Atom)