Showing posts with label Michelle's Myths. Show all posts
Showing posts with label Michelle's Myths. Show all posts
Friday, 6 February 2015
**** New CT Timeline Set - Clockwork Girl ****
For this Set I have used the Kit, Clockwork Girl by Michelle's Myths.
This Kit can be Purchased HERE.
Please do NOT save this set. It was made for the Kit Designer Only.


**** Timeline Set made with Michelle's Myths Just a Cowgirl Kit ****
This set is snaggable but is for PU ONLY. You must NOT add anything to this, that includes names.


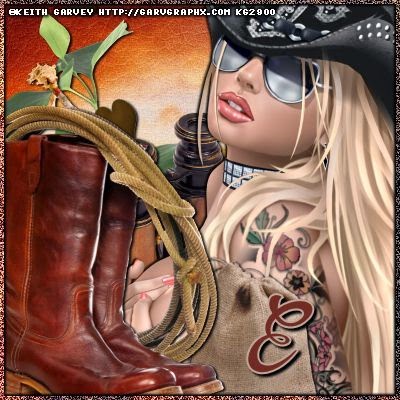


**** Just a Cowgirl by Michelle's Myths Timeline Set ****
I made this Timeline Set using the Awesome Kit, Just A Cowgirl by Michelle's Myths.
This Kit can be Purchased HERE.
Please do NOT save this set. It was made for the Kit Designer Only.


**** New Tag & Snags - Steampunk Romance - Michelle's Myths ****
I have made this tag & snags using Michelle's Myths Kit, Steampunk Romance.
This Kit can be purchased HERE.
The snags are for PU ONLY. Do NOT add any names or elements to them.

Tag made for the Kit Designer.
Now for the FTU Snags.


Thursday, 13 November 2014
**** New CT Tutorial for Mystical Scraps Store - Creative Tubes By Crys - Willow & Michelle's Myths Kit, November ****

Now for the Tutorial
This tutorial is written with the assumption that you have working knowledge of PSP.
It was written by Dance In The Rain on 13th November 2014 & is intended for educational purposes only.
Supplies:
Scrap Kit: November by Michelle's Myths found HERE
Tube: Willow by Creative Tubes By Crys found HERE
(You must have a license to use this tube)
Font of Choice - I used Alex Brush.
Mask 8 by Chrissy's Chaos found HERE
♥ Lets get started ♥
For the Drop Shadow on everything except the tube I am using the following settings:
Vertical: 1
Horizontal: 2
Opacity: 100
Blur: 3.00
Color: Black (You can use any color you wish)
Tube Drop Shadow Settings:
Vertical: 2
Horizontal: 2
Opacity: 100
Blur: 3.00
Color: Black
Remember to save everything as you go along in order not to lose it in case of a crash.
DNR means Do Not Resize.
C&P means Copy & Paste.
DS means Drop Shadow.
I am using the following elements frames & Papers:
* Paper 7 - DNR
* Element 44 - DNR
* Element 95 - Resized to 110%
* Element 46 - Resized to 115%
* Element 26 - Resized to 60%
You can look back at my image for placement of elements.
Open Paper 7 (DNR)
Open your Mask in a different window (DNR)
Click on Paper 7 window and go to Layers, New Layer Group, Click ok.
Click on Layers again & New Mask Layer, From Image.
In the source window click on the Mask Layer. Click ok.
C&P Element 44 on to your mask layer.
DNR & Position. Apply Drop Shadow.
C&P Element 95 on to your image.
Resize to 110% and position. Apply Drop Shadow.
C&P Element 46 on to your image.
Resize to 115% and position. Apply Drop Shadow.
C&P Element 26 on to your image.
Resize to 60%, Position and apply drop shadow.
C&P your Tube on to your image.
Resize to 50% and position. Apply Drop Shadow.
Remember to use the Tube Drop Shadow Settings.
We are almost done now.
Add your name. I used font size 20 and color Orange with an outline color Brown
I also applied a drop Shadow using the TUBE settings.
Add your copyright info, License number & Merge Visible.
Save & you're done. Simply & Easy.
I would love to see what you make using my tutorial.
Thank you for following my Tutorial & I hope you enjoyed it.
If you have any questions please feel free to email me at danceintherain1990@gmail.com

It was written by Dance In The Rain on 13th November 2014 & is intended for educational purposes only.
Supplies:
Scrap Kit: November by Michelle's Myths found HERE
Tube: Willow by Creative Tubes By Crys found HERE
(You must have a license to use this tube)
Font of Choice - I used Alex Brush.
Mask 8 by Chrissy's Chaos found HERE
♥ Lets get started ♥
For the Drop Shadow on everything except the tube I am using the following settings:
Vertical: 1
Horizontal: 2
Opacity: 100
Blur: 3.00
Color: Black (You can use any color you wish)
Tube Drop Shadow Settings:
Vertical: 2
Horizontal: 2
Opacity: 100
Blur: 3.00
Color: Black
Remember to save everything as you go along in order not to lose it in case of a crash.
DNR means Do Not Resize.
C&P means Copy & Paste.
DS means Drop Shadow.
I am using the following elements frames & Papers:
* Paper 7 - DNR
* Element 44 - DNR
* Element 95 - Resized to 110%
* Element 46 - Resized to 115%
* Element 26 - Resized to 60%
You can look back at my image for placement of elements.
Open Paper 7 (DNR)
Open your Mask in a different window (DNR)
Click on Paper 7 window and go to Layers, New Layer Group, Click ok.
Click on Layers again & New Mask Layer, From Image.
In the source window click on the Mask Layer. Click ok.
C&P Element 44 on to your mask layer.
DNR & Position. Apply Drop Shadow.
C&P Element 95 on to your image.
Resize to 110% and position. Apply Drop Shadow.
C&P Element 46 on to your image.
Resize to 115% and position. Apply Drop Shadow.
C&P Element 26 on to your image.
Resize to 60%, Position and apply drop shadow.
C&P your Tube on to your image.
Resize to 50% and position. Apply Drop Shadow.
Remember to use the Tube Drop Shadow Settings.
We are almost done now.
Add your name. I used font size 20 and color Orange with an outline color Brown
I also applied a drop Shadow using the TUBE settings.
Add your copyright info, License number & Merge Visible.
Save & you're done. Simply & Easy.
I would love to see what you make using my tutorial.
Thank you for following my Tutorial & I hope you enjoyed it.
If you have any questions please feel free to email me at danceintherain1990@gmail.com

Thursday, 30 October 2014
**** Timeline Set Show Off for Dark & Light Graphics - High Hopes ****
I made this set using the High Hopes Breast Cancer Awareness Tube by Dark & Light Graphics found HERE.
I paired her with the gorgeous Kit by Michelle's Myths found HERE.
Please do not save this set. It was made for the Tube Artist only.


Wednesday, 1 October 2014
**** CT Tutorial for KIT - Arthur Crowe New Release - Lovely Devil ****

Now for the Tutorial
This tutorial is written with the assumption that you have working knowledge of PSP.
It was written by Dance In The Rain on 1st October 2014 & is intended for educational purposes only.
Supplies:
Scrap Kit: Lovely Devil By Michelle's Myths
Tube: Lovely Devil by Arthur Crowe.
This is an Exclusive Kit Match that can only be found HERE
(You must have a license to use this tube)
Font of Choice - I used Dollie Script
Mask: 6 By Millie's PSP Madness found HERE
♥ Lets get started ♥
For the Drop Shadow on everything except the tube I am using the following settings:
Vertical: 1
Horizontal: 2
Opacity: 100
Blur: 3.00
Color: Black (You can use any color you wish)
Tube Drop Shadow Settings:
Vertical: 3
Horizontal: 3
Opacity: 100
Blur: 3.00
Color: Black
Remember to save everything as you go along in order not to lose it in case of a crash.
DNR means Do Not Resize.
C&P means Copy & Paste.
DS means Drop Shadow.
I am using the following elements frames & Papers:
* Paper 4 - DNR
* Element 13 - Resized to 125%
* Element 6 - Resized to 125%
* Element 15 - Resized to 125%
* Element 1 - Resized to 125%
* Element 27 - Resized to 75%
* Element 30 - Resized to 50%
You can look back at my image for placement of elements.
Open Paper 4 (DNR)
Open your Mask in a different window (DNR)
Click on Paper 4 window and go to Layers, New Layer Group, Click ok.
Click on Layers again & New Mask Layer, From Image.
In the source window click on the Mask Layer. Click ok.
C&P Element 13 on to your mask layer.
Resize to 125% & Position. Apply Drop Shadow.
C&P Element 6 on to your image.
Resize to 125% and position. NO Drop Shadow.
C&P Element 15 on to your image.
Resize to 125% and position. Apply Drop Shadow.
C&P Element 1 on to your image.
Resize to 125% and position. Apply Drop Shadow.
C&P Element 27 on to your image.
Resize to 75% and position. Apply Drop Shadow.
Duplicate Element 27 - Flip Horizontally - No need to add extra Drop Shadow.
C&P E30 on to your image.
Resize to 50% and position. Apply Drop Shadow.
C&P your Tube on to your image.
DNR
Position & Apply Drop Shadow.
We are almost done now.
Add your name. I used font size 36 and color White with an outline color Red.
I also applyed a drop Shadow using the TUBE settings.
Add your copyright info, License number & Merge Visible.
Save & you're done. Simply & Easy.
I would love to see what you make using my tutorial.
Thank you for following my Tutorial & I hope you enjoyed it.
If you have any questions please feel free to email me at danceintherain1990@gmail.com
It was written by Dance In The Rain on 1st October 2014 & is intended for educational purposes only.
Supplies:
Scrap Kit: Lovely Devil By Michelle's Myths
Tube: Lovely Devil by Arthur Crowe.
This is an Exclusive Kit Match that can only be found HERE
(You must have a license to use this tube)
Font of Choice - I used Dollie Script
Mask: 6 By Millie's PSP Madness found HERE
♥ Lets get started ♥
For the Drop Shadow on everything except the tube I am using the following settings:
Vertical: 1
Horizontal: 2
Opacity: 100
Blur: 3.00
Color: Black (You can use any color you wish)
Tube Drop Shadow Settings:
Vertical: 3
Horizontal: 3
Opacity: 100
Blur: 3.00
Color: Black
Remember to save everything as you go along in order not to lose it in case of a crash.
DNR means Do Not Resize.
C&P means Copy & Paste.
DS means Drop Shadow.
I am using the following elements frames & Papers:
* Paper 4 - DNR
* Element 13 - Resized to 125%
* Element 6 - Resized to 125%
* Element 15 - Resized to 125%
* Element 1 - Resized to 125%
* Element 27 - Resized to 75%
* Element 30 - Resized to 50%
You can look back at my image for placement of elements.
Open Paper 4 (DNR)
Open your Mask in a different window (DNR)
Click on Paper 4 window and go to Layers, New Layer Group, Click ok.
Click on Layers again & New Mask Layer, From Image.
In the source window click on the Mask Layer. Click ok.
C&P Element 13 on to your mask layer.
Resize to 125% & Position. Apply Drop Shadow.
C&P Element 6 on to your image.
Resize to 125% and position. NO Drop Shadow.
C&P Element 15 on to your image.
Resize to 125% and position. Apply Drop Shadow.
C&P Element 1 on to your image.
Resize to 125% and position. Apply Drop Shadow.
C&P Element 27 on to your image.
Resize to 75% and position. Apply Drop Shadow.
Duplicate Element 27 - Flip Horizontally - No need to add extra Drop Shadow.
C&P E30 on to your image.
Resize to 50% and position. Apply Drop Shadow.
C&P your Tube on to your image.
DNR
Position & Apply Drop Shadow.
We are almost done now.
Add your name. I used font size 36 and color White with an outline color Red.
I also applyed a drop Shadow using the TUBE settings.
Add your copyright info, License number & Merge Visible.
Save & you're done. Simply & Easy.
I would love to see what you make using my tutorial.
Thank you for following my Tutorial & I hope you enjoyed it.
If you have any questions please feel free to email me at danceintherain1990@gmail.com
Wednesday, 24 September 2014
**** New CT Tutorial for Michelle's Myths, Wynter Dreams Kit & Elsa Tube ****

Now for the Tutorial
This tutorial is written with the assumption that you have working knowledge of PSP.
It was written by Dance In The Rain on 24th September 2014 & is intended for educational purposes only.
Supplies:
Scrap Kit: Wynter Dreams by Michelle's Myths found HERE
Tube: Elsa by Michelle's Myths HERE
(You must have a license to use this tube)
Font of Choice - I used Vujahday Script.
Mask 18 by Chrissy's Chaos found HERE
♥ Lets get started ♥
For the Drop Shadow on everything except the tube I am using the following settings:
Vertical: 1
Horizontal: 2
Opacity: 100
Blur: 3.00
Color: Black (You can use any color you wish)
Tube Drop Shadow Settings:
Vertical: 1
Horizontal: 2
Opacity: 100
Blur: 3.00
Color: Black
Remember to save everything as you go along in order not to lose it in case of a crash.
DNR means Do Not Resize.
C&P means Copy & Paste.
DS means Drop Shadow.
I am using the following elements frames & Papers:
* Paper 4 - DNR
* Element 20 - Resized to 50%
* Element 14 - Resized to 75%
* Element 53 - Resized to 85%
* Element 13 - Resized to 110%
* Element 43 - DNR
* Element 24 - Resized to 65%
* Element 23 - Resized to 75%
* Element 42 - Resized to 50%
* Element 18 - Resized to 50%
You can look back at my image for placement of elements.
Open Paper 4 (DNR)
Open Mask 113 in a different window (DNR)
Click on Paper 4 window and go to Layers, New Layer Group, Click ok.
Click on Layers again & New Mask Layer, From Image.
In the source window click on the Mask Layer. Click ok.
C&P Element 20 on to your mask layer.
Resize to 50% & Position. Apply Drop Shadow.
C&P Element 14 on to your image.
Resize to 75% and position. Apply Drop Shadow.
C&P Element 53 on to your image.
Resize to 85% and position. Apply Drop Shadow.
C&P Element 13 on to your image.
Resize to 110%, Position and apply drop shadow.
C&P Element 43 on to your image.
DNR and position. Apply Drop Shadow.
C&P Element 24 on to your image.
Resize to 65% and position. Apply Drop Shadow.
C&P Element 23 on to your image.
Resize to 75% and position. Apply Drop Shadow.
C&P Element 42 on to your image.
Resize to 50% and position. Apply Drop Shadow.
C&P Element 18 on to your image.
Resized to 50% and position. Apply Drop Shadow.
C&P your Tube on to your image.
Resize to 50% and position. Apply Drop Shadow.
Remember to use the Tube Drop Shadow Settings.
We are almost done now.
Add your name. I used font size 72 and color Blue with an outline color White.
I also applied a drop Shadow using the TUBE settings.
Add your copyright info, License number & Merge Visible.
Save & you're done. Simply & Easy.
I would love to see what you make using my tutorial.
Thank you for following my Tutorial & I hope you enjoyed it.
If you have any questions please feel free to email me at danceintherain1990@gmail.com
It was written by Dance In The Rain on 24th September 2014 & is intended for educational purposes only.
Supplies:
Scrap Kit: Wynter Dreams by Michelle's Myths found HERE
Tube: Elsa by Michelle's Myths HERE
(You must have a license to use this tube)
Font of Choice - I used Vujahday Script.
Mask 18 by Chrissy's Chaos found HERE
♥ Lets get started ♥
For the Drop Shadow on everything except the tube I am using the following settings:
Vertical: 1
Horizontal: 2
Opacity: 100
Blur: 3.00
Color: Black (You can use any color you wish)
Tube Drop Shadow Settings:
Vertical: 1
Horizontal: 2
Opacity: 100
Blur: 3.00
Color: Black
Remember to save everything as you go along in order not to lose it in case of a crash.
DNR means Do Not Resize.
C&P means Copy & Paste.
DS means Drop Shadow.
I am using the following elements frames & Papers:
* Paper 4 - DNR
* Element 20 - Resized to 50%
* Element 14 - Resized to 75%
* Element 53 - Resized to 85%
* Element 13 - Resized to 110%
* Element 43 - DNR
* Element 24 - Resized to 65%
* Element 23 - Resized to 75%
* Element 42 - Resized to 50%
* Element 18 - Resized to 50%
You can look back at my image for placement of elements.
Open Paper 4 (DNR)
Open Mask 113 in a different window (DNR)
Click on Paper 4 window and go to Layers, New Layer Group, Click ok.
Click on Layers again & New Mask Layer, From Image.
In the source window click on the Mask Layer. Click ok.
C&P Element 20 on to your mask layer.
Resize to 50% & Position. Apply Drop Shadow.
C&P Element 14 on to your image.
Resize to 75% and position. Apply Drop Shadow.
C&P Element 53 on to your image.
Resize to 85% and position. Apply Drop Shadow.
C&P Element 13 on to your image.
Resize to 110%, Position and apply drop shadow.
C&P Element 43 on to your image.
DNR and position. Apply Drop Shadow.
C&P Element 24 on to your image.
Resize to 65% and position. Apply Drop Shadow.
C&P Element 23 on to your image.
Resize to 75% and position. Apply Drop Shadow.
C&P Element 42 on to your image.
Resize to 50% and position. Apply Drop Shadow.
C&P Element 18 on to your image.
Resized to 50% and position. Apply Drop Shadow.
C&P your Tube on to your image.
Resize to 50% and position. Apply Drop Shadow.
Remember to use the Tube Drop Shadow Settings.
We are almost done now.
Add your name. I used font size 72 and color Blue with an outline color White.
I also applied a drop Shadow using the TUBE settings.
Add your copyright info, License number & Merge Visible.
Save & you're done. Simply & Easy.
I would love to see what you make using my tutorial.
Thank you for following my Tutorial & I hope you enjoyed it.
If you have any questions please feel free to email me at danceintherain1990@gmail.com
Monday, 25 August 2014
**** Combined CT Tutorial for Mystical Scraps Store, using Tezza's Dezignz Tube, Queen Monica & Michelle's Myths, using her Harvest Love Kit ****

Now for the Tutorial
This tutorial is written with the assumption that you have working knowledge of PSP.
It was written by Dance In The Rain on 25th August 2014 & is intended for educational purposes only.
Supplies:
Scrap Kit: Harvest Love by Michelle's Myths found HERE
Tube: Queen Monica by Tezza's Designs HERE
(You must have a license to use this tube)
Font of Choice - I used Exmouth.
Mask 113 by Me found HERE
♥ Lets get started ♥
For the Drop Shadow on everything except the tube I am using the following settings:
Vertical: 1
Horizontal: 2
Opacity: 100
Blur: 3.00
Color: Black (You can use any color you wish)
Tube Drop Shadow Settings:
Vertical: 3
Horizontal: 3
Opacity: 100
Blur: 3.00
Color: Black
Remember to save everything as you go along in order not to lose it in case of a crash.
DNR means Do Not Resize.
C&P means Copy & Paste.
DS means Drop Shadow.
I am using the following elements frames & Papers:
* Paper (1) Brown - DNR
* Element 24 - Resized to 75%
* Element 6 - Resized to 75%
* Element 23 - Resized to 30%
* Element 52 - Resized to 50%
* Element 13 - Resized to 50%
* Element 1 - Resized to 50%
* Element 42 - Resized to 30%
* Element 37 - Resized to 30%
* Element 5 - DNR
You can look back at my image for placement of elements.
Open Paper (1) (DNR)
Open Mask 113 in a different window (DNR)
Click on Paper (1) window and go to Layers, New Layer Group, Click ok.
Click on Layers again & New Mask Layer, From Image.
In the source window click on the Mask Layer. Click ok.
C&P Element 24 on to your mask layer.
Resize to 75% & Position. Apply Drop Shadow.
C&P Element 6 on to your image.
Resize to 75% and position. Apply Drop Shadow.
C&P Element 23 on to your image.
Resize to 30% and position. Apply Drop Shadow.
C&P Element 52 on to your image.
Resize to 50%, Position and apply drop shadow.
C&P Element 13 on to your image.
Resize to 50% and position. Apply Drop Shadow.
C&P Element 1 on to your image.
Resize to 50% and position. Apply Drop Shadow.
C&P Element 42 on to your image.
Resize to 30% and position. Apply Drop Shadow.
C&P Element 37 on to your image.
Resize to 30% and position. Apply Drop Shadow.
C&P Element 13 on to your image.
DNR and position. Apply Drop Shadow.
C&P your Tube on to your image.
Resize to 60% and position. Apply Drop Shadow.
Remember to use the Tube Drop Shadow Settings.
We are almost done now.
Add your name. I used font size 48 and color White with an outline color Orange.
I also applied a drop Shadow using the TUBE settings.
Add your copyright info, License number & Merge Visible.
Save & you're done. Simply & Easy.
I would love to see what you make using my tutorial.
Thank you for following my Tutorial & I hope you enjoyed it.
If you have any questions please feel free to email me at danceintherain1990@gmail.com

It was written by Dance In The Rain on 25th August 2014 & is intended for educational purposes only.
Supplies:
Scrap Kit: Harvest Love by Michelle's Myths found HERE
Tube: Queen Monica by Tezza's Designs HERE
(You must have a license to use this tube)
Font of Choice - I used Exmouth.
Mask 113 by Me found HERE
♥ Lets get started ♥
For the Drop Shadow on everything except the tube I am using the following settings:
Vertical: 1
Horizontal: 2
Opacity: 100
Blur: 3.00
Color: Black (You can use any color you wish)
Tube Drop Shadow Settings:
Vertical: 3
Horizontal: 3
Opacity: 100
Blur: 3.00
Color: Black
Remember to save everything as you go along in order not to lose it in case of a crash.
DNR means Do Not Resize.
C&P means Copy & Paste.
DS means Drop Shadow.
I am using the following elements frames & Papers:
* Paper (1) Brown - DNR
* Element 24 - Resized to 75%
* Element 6 - Resized to 75%
* Element 23 - Resized to 30%
* Element 52 - Resized to 50%
* Element 13 - Resized to 50%
* Element 1 - Resized to 50%
* Element 42 - Resized to 30%
* Element 37 - Resized to 30%
* Element 5 - DNR
You can look back at my image for placement of elements.
Open Paper (1) (DNR)
Open Mask 113 in a different window (DNR)
Click on Paper (1) window and go to Layers, New Layer Group, Click ok.
Click on Layers again & New Mask Layer, From Image.
In the source window click on the Mask Layer. Click ok.
C&P Element 24 on to your mask layer.
Resize to 75% & Position. Apply Drop Shadow.
C&P Element 6 on to your image.
Resize to 75% and position. Apply Drop Shadow.
C&P Element 23 on to your image.
Resize to 30% and position. Apply Drop Shadow.
C&P Element 52 on to your image.
Resize to 50%, Position and apply drop shadow.
C&P Element 13 on to your image.
Resize to 50% and position. Apply Drop Shadow.
C&P Element 1 on to your image.
Resize to 50% and position. Apply Drop Shadow.
C&P Element 42 on to your image.
Resize to 30% and position. Apply Drop Shadow.
C&P Element 37 on to your image.
Resize to 30% and position. Apply Drop Shadow.
C&P Element 13 on to your image.
DNR and position. Apply Drop Shadow.
C&P your Tube on to your image.
Resize to 60% and position. Apply Drop Shadow.
Remember to use the Tube Drop Shadow Settings.
We are almost done now.
Add your name. I used font size 48 and color White with an outline color Orange.
I also applied a drop Shadow using the TUBE settings.
Add your copyright info, License number & Merge Visible.
Save & you're done. Simply & Easy.
I would love to see what you make using my tutorial.
Thank you for following my Tutorial & I hope you enjoyed it.
If you have any questions please feel free to email me at danceintherain1990@gmail.com
Saturday, 16 August 2014
**** CT Tutorial for KIT - RAC Summer Treats ****

Now for the Tutorial
This tutorial is written with the assumption that you have working knowledge of PSP.
It was written by Dance In The Rain on 16th August 2014 & is intended for educational purposes only.
Supplies:
Scrap Kit: Summer Joy by Michelle's Myths found HERE
Tube: Summer Treats by Ismael Rac found HERE
(You must have a license to use this tube)
Font of Choice - I used Sexy & Sasy Serif.
Mask: 31 by Millie's PSP Madness found HERE
♥ Lets get started ♥
For the Drop Shadow on everything except the tube I am using the following settings:
Vertical: 1
Horizontal: 2
Opacity: 100
Blur: 3.00
Color: Black (You can use any color you wish)
Tube Drop Shadow Settings:
Vertical: 3
Horizontal: 3
Opacity: 100
Blur: 3.00
Color: Black
Remember to save everything as you go along in order not to lose it in case of a crash.
DNR means Do Not Resize.
C&P means Copy & Paste.
DS means Drop Shadow.
I am using the following elements frames & Papers:
* Paper 6 - DNR
* Frame 3 - Resized to 110%
* Element 40 - Resized to 110%
* Element 46 - DNR
* Element 45 - DNR
* Element 50 - Resized to 50%
* Element 251 - Resized to 50%
You can look back at my image for placement of elements.
Open Paper 6 (DNR)
Open Mask in a different window (DNR)
Click on Paper 6 window and go to Layers, New Layer Group, Click ok.
Click on Layers again & New Mask Layer, From Image.
In the source window click on the Mask Layer. Click ok.
C&P Frame 3 on to your mask layer.
Resize to 110%. Apply Drop Shadow & Position.
C&P Element 40 on to your image.
Resize to 110%. Position & apply Drop Shadow.
C&P Element 46 on to your image.
DNR. Position & apply Drop Shadow.
C&P Element 45 on to your image.
DNR. Position. Apply Drop Shadow.
C&P Element 50 on to your image.
Resize to 50%. Position. Apply Drop Shadow.
C&P Element 25 on to your image.
Resized to 50%. Position. Apply Drop Shadow.
C&P Your tube on to your image.
Resize to 50%. Position and Apply TUBE settings Drop Shadow.
We are almost done now.
Add your name. I used font size 72 and color White. Outline Color, Blue.
I have also applied a Drop Shadow using the TUBE settings
Add your copyright info, License number & Merge Visible.
Save & you're done. Simply & Easy.
I would love to see what you make using my tutorial.
Thank you for following my Tutorial & I hope you enjoyed it.
If you have any questions please feel free to email me at danceintherain1990@gmail.com
It was written by Dance In The Rain on 16th August 2014 & is intended for educational purposes only.
Supplies:
Scrap Kit: Summer Joy by Michelle's Myths found HERE
Tube: Summer Treats by Ismael Rac found HERE
(You must have a license to use this tube)
Font of Choice - I used Sexy & Sasy Serif.
Mask: 31 by Millie's PSP Madness found HERE
♥ Lets get started ♥
For the Drop Shadow on everything except the tube I am using the following settings:
Vertical: 1
Horizontal: 2
Opacity: 100
Blur: 3.00
Color: Black (You can use any color you wish)
Tube Drop Shadow Settings:
Vertical: 3
Horizontal: 3
Opacity: 100
Blur: 3.00
Color: Black
Remember to save everything as you go along in order not to lose it in case of a crash.
DNR means Do Not Resize.
C&P means Copy & Paste.
DS means Drop Shadow.
I am using the following elements frames & Papers:
* Paper 6 - DNR
* Frame 3 - Resized to 110%
* Element 40 - Resized to 110%
* Element 46 - DNR
* Element 45 - DNR
* Element 50 - Resized to 50%
* Element 251 - Resized to 50%
You can look back at my image for placement of elements.
Open Paper 6 (DNR)
Open Mask in a different window (DNR)
Click on Paper 6 window and go to Layers, New Layer Group, Click ok.
Click on Layers again & New Mask Layer, From Image.
In the source window click on the Mask Layer. Click ok.
C&P Frame 3 on to your mask layer.
Resize to 110%. Apply Drop Shadow & Position.
C&P Element 40 on to your image.
Resize to 110%. Position & apply Drop Shadow.
C&P Element 46 on to your image.
DNR. Position & apply Drop Shadow.
C&P Element 45 on to your image.
DNR. Position. Apply Drop Shadow.
C&P Element 50 on to your image.
Resize to 50%. Position. Apply Drop Shadow.
C&P Element 25 on to your image.
Resized to 50%. Position. Apply Drop Shadow.
C&P Your tube on to your image.
Resize to 50%. Position and Apply TUBE settings Drop Shadow.
We are almost done now.
Add your name. I used font size 72 and color White. Outline Color, Blue.
I have also applied a Drop Shadow using the TUBE settings
Add your copyright info, License number & Merge Visible.
Save & you're done. Simply & Easy.
I would love to see what you make using my tutorial.
Thank you for following my Tutorial & I hope you enjoyed it.
If you have any questions please feel free to email me at danceintherain1990@gmail.com
Tuesday, 29 July 2014
**** New CT Tutorial for K.I.T Promo Team - Rac Special Buy 07/29 - 07/30 ****
Spend any $$ in the Store and get the 2009 - 2013 I Been Bad HD Special Layers and the Original 2009 Version.
Just pop it in your cart at check out. No GC's accepted as a form of payment.

Now for the Tutorial
This tutorial is written with the assumption that you have working knowledge of PSP.
It was written by Dance In The Rain on 29th July 2014 & is intended for educational purposes only.
Supplies:
Scrap Kit: Dark Queen by Michelle's Myths found HERE
Tube: 2009-2013 BeenBad by Ismael Rac HERE
(You must have a license to use this tube)
Font of Choice - I used Foglihten No04.
Mask is by me and you may save it.
It was written by Dance In The Rain on 29th July 2014 & is intended for educational purposes only.
Supplies:
Scrap Kit: Dark Queen by Michelle's Myths found HERE
Tube: 2009-2013 BeenBad by Ismael Rac HERE
(You must have a license to use this tube)
Font of Choice - I used Foglihten No04.
Mask is by me and you may save it.

♥ Lets get started ♥
For the Drop Shadow on everything except the tube I am using the following settings:
Vertical: 1
Horizontal: 2
Opacity: 100
Blur: 3.00
Color: Black (You can use any color you wish)
Tube Drop Shadow Settings:
Vertical: 3
Horizontal: 3
Opacity: 100
Blur: 3.00
Color: Black
Remember to save everything as you go along in order not to lose it in case of a crash.
DNR means Do Not Resize.
C&P means Copy & Paste.
DS means Drop Shadow.
I am using the following elements frames & Papers:
* Paper 6 - DNR
* Element 36 - DNR
* Element 9 - Resized to 75%
* Element 97 - Resized to 75%
* Element 82 - Resized to 45%
* Element 70 - DNR
* Element 37 - DNR
* Element 104 - Resized to 45%
* Element 110 - DNR
You can look back at my image for placement of elements.
Open Paper 6 (DNR)
Open your Mask in a different window (DNR)
Click on Paper 6 window and go to Layers, New Layer Group, Click ok.
Click on Layers again & New Mask Layer, From Image.
In the source window click on the Mask Layer. Click ok.
C&P Element 36 on to your mask layer.
DNR & do not move. Apply Drop Shadow.
C&P Element 9 on to your image.
Resize to 75% and position. NO Drop Shadow.
C&P Element 97 on to your image.
Resize to 75% and position. Apply Drop Shadow.
C&P Element 82 on to your image.
Resize to 45%, Position and apply drop shadow.
C&P Element 70 on to your image.
DNR and position. Apply Drop Shadow.
C&P Element 37 on to your image.
DNR and position. Apply Drop Shadow.
C&P Element 104 on to your image.
Resize to 45%, Position and apply drop shadow.
C&P Element 110 on to your image.
DNR. Position and apply drop shadow.
C&P your Tube on to your image.
Resize to 35%
Position & Apply Drop Shadow.
We are almost done now.
Add your name. I used font size 72 and color Black with an outline color White.
I also applied a drop Shadow using the TUBE settings.
Add your copyright info, License number & Merge Visible.
Save & you're done. Simply & Easy.
I would love to see what you make using my tutorial.
Thank you for following my Tutorial & I hope you enjoyed it.
If you have any questions please feel free to email me at danceintherain1990@gmail.com
Vertical: 1
Horizontal: 2
Opacity: 100
Blur: 3.00
Color: Black (You can use any color you wish)
Tube Drop Shadow Settings:
Vertical: 3
Horizontal: 3
Opacity: 100
Blur: 3.00
Color: Black
Remember to save everything as you go along in order not to lose it in case of a crash.
DNR means Do Not Resize.
C&P means Copy & Paste.
DS means Drop Shadow.
I am using the following elements frames & Papers:
* Paper 6 - DNR
* Element 36 - DNR
* Element 9 - Resized to 75%
* Element 97 - Resized to 75%
* Element 82 - Resized to 45%
* Element 70 - DNR
* Element 37 - DNR
* Element 104 - Resized to 45%
* Element 110 - DNR
You can look back at my image for placement of elements.
Open Paper 6 (DNR)
Open your Mask in a different window (DNR)
Click on Paper 6 window and go to Layers, New Layer Group, Click ok.
Click on Layers again & New Mask Layer, From Image.
In the source window click on the Mask Layer. Click ok.
C&P Element 36 on to your mask layer.
DNR & do not move. Apply Drop Shadow.
C&P Element 9 on to your image.
Resize to 75% and position. NO Drop Shadow.
C&P Element 97 on to your image.
Resize to 75% and position. Apply Drop Shadow.
C&P Element 82 on to your image.
Resize to 45%, Position and apply drop shadow.
C&P Element 70 on to your image.
DNR and position. Apply Drop Shadow.
C&P Element 37 on to your image.
DNR and position. Apply Drop Shadow.
C&P Element 104 on to your image.
Resize to 45%, Position and apply drop shadow.
C&P Element 110 on to your image.
DNR. Position and apply drop shadow.
C&P your Tube on to your image.
Resize to 35%
Position & Apply Drop Shadow.
We are almost done now.
Add your name. I used font size 72 and color Black with an outline color White.
I also applied a drop Shadow using the TUBE settings.
Add your copyright info, License number & Merge Visible.
Save & you're done. Simply & Easy.
I would love to see what you make using my tutorial.
Thank you for following my Tutorial & I hope you enjoyed it.
If you have any questions please feel free to email me at danceintherain1990@gmail.com
Subscribe to:
Posts
(Atom)